> ## Documentation Index
> Fetch the complete documentation index at: https://docs.hostbyte.net/llms.txt
> Use this file to discover all available pages before exploring further.
# How to Whitelist players on your Java Server
> Whitelisting lets you control who can join your Minecraft Java server. This guide shows you how to enable the whitelist, add/remove players, and fix common issues using the HostByte Game Panel.
## What is the Whitelist?
The whitelist is an allow-list. When enabled, **only players you add** can join your server. Everyone else will see *“You are not whitelisted on this server!”*
* Works with Vanilla, Paper, Spigot, Forge/Fabric (Java Edition).
* Player entries are stored in `whitelist.json` in your server files.
***
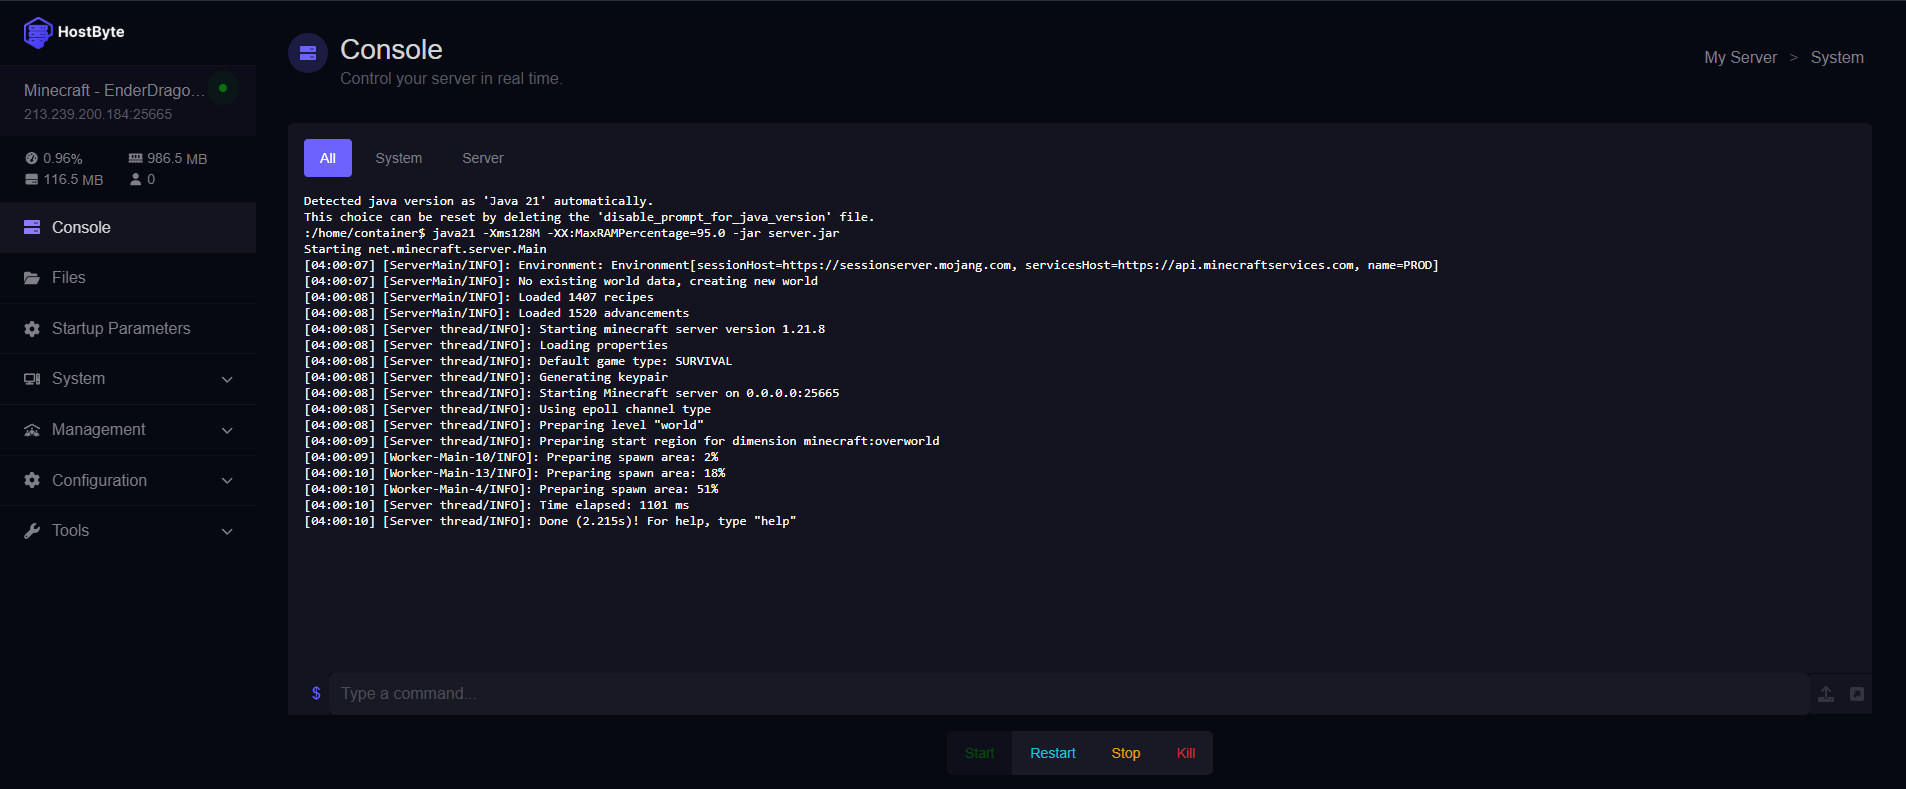
## Step 1: Open Your Server Console
1. Log in to the [HostByte Game Panel](https://game.hostbyte.net/).
2. Click your Java server to open its dashboard.
3. In the left sidebar, click **Console**.
 ## Step 2: Enable the Whitelist (Quick Method)
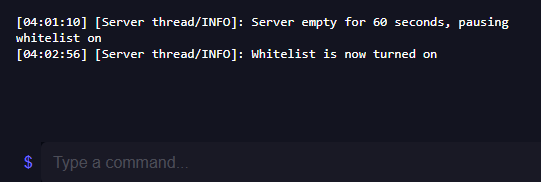
You can enable the whitelist live with a single console command (no restart required):
```
whitelist on
```
To disable it later:
```
whitelist off
```
***
## Step 2: Enable the Whitelist (Quick Method)
You can enable the whitelist live with a single console command (no restart required):
```
whitelist on
```
To disable it later:
```
whitelist off
```
***
 ## Step 3: Add Players to the Whitelist
Add players by their exact Java username. From the **Console** (no slash):
```
whitelist add PlayerName
```
In-game (as an OP) use the slash command:
```
/whitelist add PlayerName
```
### Remove a Player
```
whitelist remove PlayerName
```
### List Whitelisted Players
```
whitelist list
```
### Reload the Whitelist
```
whitelist reload
```
**➡️ Note:** Usernames are resolved to a player’s unique UUID. If a player changes their username, they will *still* be allowed if originally added successfully.
***
## Step 4 (Optional): Enable via `server.properties`
If you prefer enabling the whitelist through the config file:
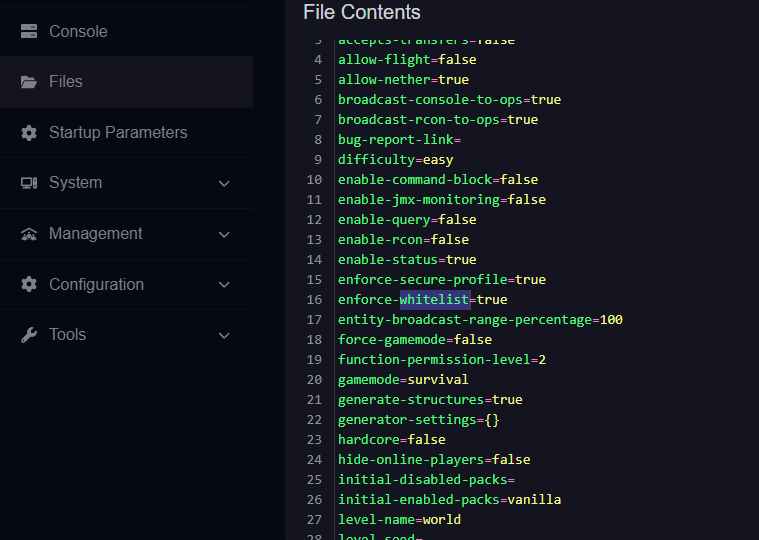
1. Click **Files** on the left side of the panel.
2. Edit `server.properties`.
3. Set the line to: `white-list=true`
4. Also set the line to: `enforce-whitelist=true`
5. Click **Save** and **Restart** the server.
**⚠️ Heads-up:** Only use one method at a time. If you enable via file, remember to restart; if you use console commands, you can apply changes immediately and `whitelist reload` as needed.
***
## Step 3: Add Players to the Whitelist
Add players by their exact Java username. From the **Console** (no slash):
```
whitelist add PlayerName
```
In-game (as an OP) use the slash command:
```
/whitelist add PlayerName
```
### Remove a Player
```
whitelist remove PlayerName
```
### List Whitelisted Players
```
whitelist list
```
### Reload the Whitelist
```
whitelist reload
```
**➡️ Note:** Usernames are resolved to a player’s unique UUID. If a player changes their username, they will *still* be allowed if originally added successfully.
***
## Step 4 (Optional): Enable via `server.properties`
If you prefer enabling the whitelist through the config file:
1. Click **Files** on the left side of the panel.
2. Edit `server.properties`.
3. Set the line to: `white-list=true`
4. Also set the line to: `enforce-whitelist=true`
5. Click **Save** and **Restart** the server.
**⚠️ Heads-up:** Only use one method at a time. If you enable via file, remember to restart; if you use console commands, you can apply changes immediately and `whitelist reload` as needed.
***
 ## Step 5 (Advanced): Edit `whitelist.json` Manually
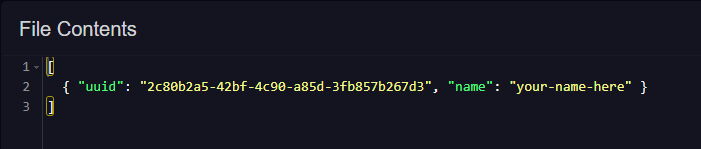
You can add entries directly, but you must use correct UUIDs. We recommend using commands unless you know the player’s UUID.
1. Open **File Manager** → find `whitelist.json`.
2. Use valid JSON entries like:
```
[
{ "uuid": "00000000-0000-0000-0000-000000000000", "name": "PlayerName" }
]
```
3. Save and run `whitelist reload` in the console.
## Step 5 (Advanced): Edit `whitelist.json` Manually
You can add entries directly, but you must use correct UUIDs. We recommend using commands unless you know the player’s UUID.
1. Open **File Manager** → find `whitelist.json`.
2. Use valid JSON entries like:
```
[
{ "uuid": "00000000-0000-0000-0000-000000000000", "name": "PlayerName" }
]
```
3. Save and run `whitelist reload` in the console.
 \
\
\*\*⚠️ Heads-up: \*\*You can find your UUID using a website like: [https://mcuuid.net/](https://mcuuid.net/)
***
## Command Quick-Reference
* `whitelist on` — Enable whitelist
* `whitelist off` — Disable whitelist
* `whitelist add ` — Add a player
* `whitelist remove ` — Remove a player
* `whitelist list` — Show all whitelisted players
* `whitelist reload` — Reload changes without restarting
***
## ⚠️ Common Issues & Fixes
### “You are not whitelisted on this server!” (but they are added)
* Run `whitelist reload` to re-scan the list.
* Confirm the username spelling (case-sensitive) on first add.
* Make sure you edited the correct server if you run a network/proxy.
* Restart the server if you changed `server.properties`.
### “Failed to add player / profile not found”
* Ensure the player has a legitimate Java account and correct username.
* Verify your server has internet connectivity (for UUID lookup).
* Try again in a few minutes (rate limits can briefly fail lookups).
### Whitelist appears ineffective
* Verify whitelist is actually on: `whitelist on`.
* If you recently edited files, restart or run `whitelist reload`.
* Keep `online-mode=true` in `server.properties` for secure authentication.
***
## Security Best Practices
* Keep **online-mode** enabled to validate player identities.
* Whitelist your admins and staff too—don’t rely on OP alone.
* Use **LuckPerms** for fine-grained permissions control.
* Back up `server.properties` and `whitelist.json` regularly.
***
## Getting Help
* **Knowledge Base:** Browse more Java Edition guides.
* **Support Ticket:** Log in to your HostByte account to open a ticket.
* **Discord:** Join our community:
* **Status Page:** Check maintenance/outages at [status.hostbyte.net](https://status.hostbyte.net/).
\
\
\*\*⚠️ Heads-up: \*\*You can find your UUID using a website like: [https://mcuuid.net/](https://mcuuid.net/)
***
## Command Quick-Reference
* `whitelist on` — Enable whitelist
* `whitelist off` — Disable whitelist
* `whitelist add ` — Add a player
* `whitelist remove ` — Remove a player
* `whitelist list` — Show all whitelisted players
* `whitelist reload` — Reload changes without restarting
***
## ⚠️ Common Issues & Fixes
### “You are not whitelisted on this server!” (but they are added)
* Run `whitelist reload` to re-scan the list.
* Confirm the username spelling (case-sensitive) on first add.
* Make sure you edited the correct server if you run a network/proxy.
* Restart the server if you changed `server.properties`.
### “Failed to add player / profile not found”
* Ensure the player has a legitimate Java account and correct username.
* Verify your server has internet connectivity (for UUID lookup).
* Try again in a few minutes (rate limits can briefly fail lookups).
### Whitelist appears ineffective
* Verify whitelist is actually on: `whitelist on`.
* If you recently edited files, restart or run `whitelist reload`.
* Keep `online-mode=true` in `server.properties` for secure authentication.
***
## Security Best Practices
* Keep **online-mode** enabled to validate player identities.
* Whitelist your admins and staff too—don’t rely on OP alone.
* Use **LuckPerms** for fine-grained permissions control.
* Back up `server.properties` and `whitelist.json` regularly.
***
## Getting Help
* **Knowledge Base:** Browse more Java Edition guides.
* **Support Ticket:** Log in to your HostByte account to open a ticket.
* **Discord:** Join our community:
* **Status Page:** Check maintenance/outages at [status.hostbyte.net](https://status.hostbyte.net/).